
This tutorial was created by Rapsody on September 30th, 2011.
Any similarity to any other tutorial is purely a coincidence.
You may share this tut but please share the only the link, thank you♥
I am using PSP 12 but any version should work!
We are using the amazing art of Katherine Barber You must have a license to use this tube. Kat’s tubes can purchased at UpYourArt
Elements are included with your tube.
Optional animation from Lovey’s Shack, Pixie Dust can be found HERE Thank you so much Shauna!
Font of choice. I used Satisfaction.
♥ ♥ ♥
Okay, let’s get started!
*Open a canvas 600 x600 (we will resize later) Flood fill white.
*Create new layer. Using your selection tool, and colors from you tube create a horizontal oval, convert to raster layer. **Make sure your oval is NOT close to the sides.
*Go back to your white layer create new layer.
*Move up to your oval, select all, modify expand 6.
*Move to the blank layer under you just created and flood fill with a contrasting color from your tube, flood fill, select none.
*Go to effects, Fur. Use these settings:
Blur 100, Density 75, Length 50, Transparency 75. (***Make sure not to extend out of your frame.)
*Add tube as a new layer, resize 85%, mirror, place in desired location, use my tag as reference..
*Apply large leaves from tube covering the bottom of the tube. Remove anything that hangs out on the bottom, select none.
*Return to your oval layer.
*Select large leaves from your tube, paste as new layer. Arrange on the oval, use your PICK tool to manipulate, lower opacity to about 65%. Duplicate, place in another area, rotating if you need to using your pick tool. Do this as many times as you wish using my tag as a guide. You may also want to use other leaves from the tube.
*Go to your top layer and add your copyright information.
*Using your selection tool set to zero, go around the outside being careful not to cut off anything, crop to selection, delete extra layer.
*Add your name, I used Satisfaction at 125 and add a white drop shadow.
*If you don’t care to animate you are done. You can delete the white bottom layer and save as a PNG.
*Select all, copy and paste into Animation Shop. Duplicate till you have 23 frames.
*Open your animation from Lovely. X out the black frame (first frame). Select all, reverse frames. ***We do this so we can be certain of where we are placing the animation.
*Still with your first frame of the animation selected, select all, copy. Go to your first frame of your tag.
*Select all, propagate and paste, position near her extended hand.
*Click on the first frame, select all, reverse animation and save your tag!
Yay, we are done, now that’s easy peasy!!!!
Thank you for visiting and doing this tutorial, I hope you found it enjoyable. I would love to see your results and I welcome any suggestions at CustomerService@UpYourArt.com
~♥~
This tutorial was created by Rapsody on September 27, 2011.
Any similarity to any other tutorial is purely a coincidence.
You may share this tut but please share the only the link, thank you♥
I am using PSP 12 but any version should work!
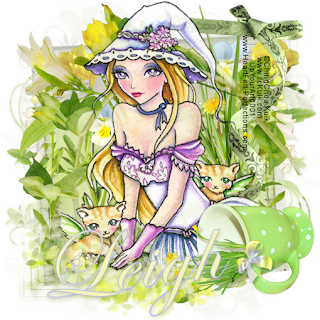
We are using the amazing art of Ching Chou Kuik You must have a license to use this tube. Ching Chou's tubes can purchased at UpYourArt
The gorgeous amazing scrap kit “In the Garden” is found at HeartFelt-Perfections, Thank you Leigh!
We will be using:
paper 2
frame 2
floral brush
floral cup
ribbon
Grass
floral cup
floral brush
floral 10
floral 6
floral
floral 2
ribbon
**After you use each element close it so you have a clean workspace.
Mask can be found at Essex Girl (Cornered Octagon)
Font: Edwardian Script ITC size 125
Okay, let’s get started!
*Open a canvas 600 x600 select all, paste into selection paper 2, select none.
*Apply your mask, merge group. Add drop shadow on a new layer with #a4b571 opacity 8.
*duplicate mask layer and go to bottom mask layer.
*Find frame element paste as a new layer so it is between the 2 mask layers, resize 25%.
*Copy tube CK0055 and paste as a new layers, resize 85%, and move all the way up lower opacity to 85%.
*Grab frame 2, paste as a new layer, resize 25%, rotate 90% lower opacity 85%, move below tube.
*Grab the floral brush, paste as a new layer, resize 17%, move to bottom left of tube.
*Get your floral cup, resize 75% move to right of tube to cover edges of tube.
*Return to the top mask layer.
***To add the flowers, I like to have my Picker tool activated so I can find them easily and tweak them if needed.
*Copy floral 10, paste as a new layer, resize 15% move to the left, duplicate, mirror then move to the right.
*Copy your floral 6, paste as a new layer, resize 15%, move to desired location on left, duplicate, then mirror and move new one appropriately on right side. Select and delete any that hangs too low on the bottom.
*Copy, floral 2, paste as new layer, resize 15%, duplicate, mirror, arrange
*Copy grass and paste as a new layer, resize 16%, move toward right, duplicate, mirror then move to upper left.
*Copy bow, paste on your tag as a new layer, resize 20%, move to upper right.
*Merge visible, resize all 85%
*Apply your copyright, url, and license number.
*Add name, using Edwardian font, using 2 colors from your tag.
*Save as a PNG, you are done, YAY♥
Thank you for visiting and doing this tutorial, I hope you found it enjoyable. I would love to see your results and I welcome any suggestions at CustomerService@UpYourArt.com
♥ ♥ ♥

This tutorial was created by Rapsody on September 23, 2011.
Any similarity to any other tutorial are purely a coincidence.
You may share this tut but please share the only the link, thank you♥
I am using PSP 12 but any version should work!
We are using the amazing art of Lisa Victoria You must have a license to use this tube. Lisa's tubes can purchased at UpYourArt
The gorgeous FTU scrapkit Neon Green is found at BK SCRAPS
BKS Frame, BKS Heart, BKS Stars, BKS Butterfly
Mask can be found at VIX Big Mask 2 contains 9 masks! We are using #8
Font used is Arial
Okay, let’s get started!
*Open a canvas 600 x600 Flood fill with black (or a paper from the kit)
*Apply your mask #8, merge group.
*Open the Frame, copy and paste as a new layer. Now do not use the mover but the Picker (the arrow) so that we can make the frame shorter. Mode is Free. Pull the top tab to make it shorter, reposition the frame so it is off to the right of your mask.
*Go to the Stars, move them so you can grab the largest one with your lasso tool, copy and paste as a new layer. Position to the bottom left as pictured. Using your Change To Target tool color it an orange from your tube.
*Grab the medium star by selecting again,add as a new layer and position just under the top of the frame. Color Change Target a purple from your tube.
*Grab the smaller star, select paste as a new layer, move to the outer left top of the frame.
*Get your Lisa Victoria Monster tube, copy and paste as a new layer, resize 85%.
Readjust all the stars and tube where you want.
*Move down one layer, paste the heart, Change to target purple if you wish. Position just under the monster’s “hand.”
*Next up to top layer, copy and paste the butterfly on the upper right, making certain to not cut off the wings, add a slight drop shadow.
*With your selection tool go about the outside of all the images and crop to selection. Be careful not to cut off anything.
*Merge visible, resize to 80%
*Add your copyright information and license number.
*Add your text size 60, I use the green and orange from the tube with and slight drop shadow (black).
*Save as a PNG, you are done, YAY♥
Thank you for visiting and doing this tutorial, I hope you found it enjoyable. I would love to see your results and I welcome any suggestions at CustomerService@UpYourArt.com
♥ ♥ ♥


