Showing posts with label Gretchen Raish-Baskin. Show all posts

Tuesday, July 10, 2012

Divine


This tutorial was created by Rapsody on July 10th, 2012.
Any similarity to any other tutorial is purely a coincidence.
I have not used plugins or drops shadows but recommend you use them where you see fit.
You may share this tut but please share the only the link, thank you
I am using PSP 14 but any version should work!

We are using the lovely art of Gretchen Raishe-Baskin  GR0009, you must have a license to use this tube. Gretchen’s tubes must be purchased at UpYourArt
This wonderful kit “So Devine” by Leigh Penrod can be found HERE Thank you so much Leigh!
Font AlexBrush which You can find HERE.

We will be using:
Tube GR0009
E31 (White Frame)
P7 (paper)
E16 (beads)
E40 (flower stem)
E10 (baby's breath)
E11 (angel sleeping)
E34 (blue ribbon)
E39 (flowers with ribbon)
Blue butterfly from tube
**After you use each element close it so you have a clean workspace.

Okay, let’s get started!

*Open a pallet 700 X 700, flood fill white.
* Copy E31 (White Frame) as a new layer, resize 42%
Add a drop shadow AS A NEW LAYER with these settings:
0 0 100 15
I used #ad83f5.
Go to your shadow layer, add FUR texture effect with all settings maxed.
*Go to the original frame layer, with your selection tool touch activate the inside of the frame.
*Go to the white (bottom) layer, & create a new layer. Paste paper P7 into selection.  Select none.
*Stay on the paper layer and add the effect blinds with these settings:
20  50 and white
Do it horizontally, then vertically.
*Copy E16 (Beads) and paste as a new layer.  Resize 20%, move to the right, see my tag for reference.
*Paste E40 (flower stem) as a new layer, resize 12% and move to the right of the frame being careful to not have any overlap on the frame.  Duplicate, and move down a bit and remove any over hang on the frame.
*Paste E10 (baby's breath) as a new layer, resize 8%, mirror and position on the lower left corner.
*Paste E11 as a new layer, resize 19% and position on the lower left as well.
Copy your tube (GR0009) and paste as a new layer, remove butterflies.  Add a drop shadow with the same color and fur settings.
*Return to the top layer, paste E34 (blue ribbon) resize 20% then rotate left 90, position on the right near her hand, see my tag for reference.
Paste E39 (flowers with ribbon) as new layer resize 12% then move to the left side.
*Go to your tube and find the butterfly layers, select the blue one then paste it as a new layer, position on the upper left.
*Make sure everything is where you desire it.
*Merge, select all, float, crop to selection.
* Resize all 70%.
*Add your Copyright and URL and license number.
*Add name, I used Alexbrush  at 75 white with the same drop shadow used throughout this tut.
*Save as a PNG, you are done, YAY
Thank you for visiting and doing this tutorial, I hope you found it enjoyable. I would love to see your results and I welcome any suggestions at CustomerService@UpYourArt.com
Raps

Wednesday, October 12, 2011

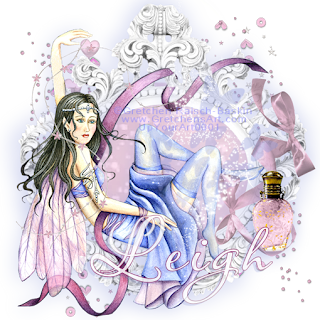
Heavenly


This tutorial was created by Rapsody on October 12, 2011.
Any similarity to any other tutorial is purely a coincidence.
You may share this tut but please share the only the link, thank you
I am using PSP 12 but any version should work!

We are using the enchanting art of the late Gretchen Raish-Baskin   You must have a license to use this tube. Gretchen’s tubes can purchased at UpYourArt
This beautiful scrap kit “Angel’s Breath” is found at HeartFelt-Perfections, Thank you Leigh!
We will be using:
Butterflies
Ribbon Bow (pink)
Paper 7
Hearts
Flower String
Frame 4
Bottle

Sparkle
**After you use each element close it so you have a clean workspace.
Font: I used Passion Conflict by Rob size 125, it is a pay font but any script font will work.
Okay, let’s get started!
*Open a canvas 600 x600 flood fill white. I like to have the white so I can see my creation better as I work on it.  We will delete this later.
*Copy Frame 4 and paste as a new layer, re size 30%.  Add a color from your tube as drop shadow on a new layer, I used a blue, with these settings:
Offset 3, Horizontal -5, Opacity 30, Blur 50
Return to the frame layer, re-size 95% move to the top edge, do not touch or re-size the mask layer.
*Apply your tube, re-size 90% , position her so her back is resting on the frame and she is not extended off the pallet, add the blue drop shadow with the same settings.
*Go to your white bottom layer and add a new layer, then go to the frame layer. Select the magic wand inside the frame and modify expand 5. 
*Copy your Paper and return to your tag on the layer you just created and paste into section, select none.
*Return to the frame layer, using my tag for reference, and select some portions of the upper ribbon so it looks like it is woven though the frame, float, return to your tube layer, delete, select none. **You may want to lower the opacity of the tube to see the frame below, then raise it back to 100%**
*Copy your Pink Ribbon Bow and paste as a new layer, re-size 25%, add blue drop shadow, then lower opacity to 75%.
*Copy the Pink Bottle, paste as a new layer, re-size 35% add blue drop shadow.
*Copy the Flower String, paste as a new layer, re-size 25%, position to desired location. Then delete a bit of the string see her left arm on my tag for reference.
*Copy the Butterflies, paste as a new layer, re-size 25%, remove the handle part of this element.  Now, add the blue drop shadow, changing these settings:  Blur 0, Opacity and 40%. Move up to the original Butterflies element and delete.
*Copy your Sparkle paste as a new layer; re-size 28% position to the mid right.
*Go to your white layer, copy the splatter, paste as a new selection, re-size 45%.  Activate your Pick tool and move the splatter to the right, duplicate, mirror, flip, with your Pick tool move down a tad.
*Stay on the top Splatter layer, copy the Hearts, paste as a new layer. Re-size, 30%, use your pick tool and move to the left so the heart is near her hand. Lower opacity to 50%.
*Make sure everything is where you like it, then delete the bottom white layer, and merge visible. 
*Re-size 85%.
*Apply your copyright, url, and license number.
*Add name, using your script font, using 2 colors from your tag, add blue drop shadow.
*Save as a PNG, you are done, YAY

Thank you for visiting and doing this tutorial, I hope you found it enjoyable. I would love to see your results and I welcome any suggestions at CustomerService@UpYourArt.com