Monday, December 16, 2013

Purrrfect Christmas


This a quick and easy peasy tutorial was created by Rapsody on December 16th, 2013.
Any similarity to any other tutorial is purely a coincidence.
I have not used plugins but please use them where you see fit.
For my drop shadows I have used:
Black: Offset -10 Horizontal 5 Opacity 50 Blur 10 Color Black
You may share this tut but please share the only the link, thank you♥
I am using PSP 16 but any version should work!
 ~~~~~~ ♥ ~~~~~~
We are using the lovely art of  Lisa Victoria Victoria LV0076,  you must have a license to use this art. Lisa's tubes must be purchased at UpYourArt
This wonderful kit “Christmas Cheer” by Dezines By Baby Dragon can be found HERE at my favorite scrap store ScrapsFromTheHeart!  What a fun kit Becca and there are so many other wonderful elements to use!!!!!
Font: Any script one, I used HaloHandletter.
 ~~~~~~ ♥ ~~~~~~
We will be using the following: frame 01 resize 75% mirror
My word art:


Paper 04 resize 50%
Ele 15 Christmas tree
Tube LV0076
Ele13 Merry Christmas
There are some other great elements that would enhance this tag, take a peek!


**After you use each element close it so you have a clean workspace.
 Okay, let’s get started!
Please note, you can reposition the elements once completed before merging!


1)      Open new image with a white background 700 x 700
2)      Paste frame 01 as a new layer, mirror and resize 75%
3)      Apply my  word art as shown on my tag, add a drop shadow.
4)      Take paper 04, resize 50%.
5)      Return to the frame layer.  With your selection tool, click inside the frame, invert.
6)       Go to the new layer, modify by 2, expand, and paste the resized paper  04 into the selection (in the new layer.) Select none, move layer down one.
7)      Return to the frame layer.  Paste Ele15 Christmas tree as a new layer move so it is just outside the word art.  Add your drop shadow.
8)      Add your tube LV0076 and resize to 70%, position it, use my tag as a guide.
9)      Past Ele 13 Merry Christmas as a new layer, move to the bottom, go to the cat’s toe and select,, return to the Merry Christmas element and delete so the toes appear to be on top. Add your drop shadow.
10)   Make sure everything is where you like it, and you have your drop shadows.  Merge visible.
11)   Add your copyright information, and UpYourArt license number.
 
               Add the name you wish and enjoy, hope your Christmas is Purrrfect!


                 Save as a PNG, you are done, YAY♥
Thank you for visiting and doing this tutorial, I hope you found it enjoyable. I would love to see your results and I welcome any suggestions at CustomerService@UpYourArt.com
Raps


Broken Angel

 
This tutorial was created by Rapsody on December 16th, 2013.
 Any similarity to any other tutorial is purely a coincidence.
I have not used plugins but please use them where you see fit.
For my drop shadows I have used:
Black: Offset -10 Horizontal 5 Opacity 50 Blur 10 Color Black
You may share this tut but please share the only the link, thank you♥
I am using PSP 16 but any version should work!
 ~~~~~~ ♥ ~~~~~~
We are using the lovely art of  Lady Fanhir FI0025, you must have a license to use this art. Stefania’s tubes must be purchased at UpYourArt
This wonderful kit “Punky Christmas” by Designz By BabyDragon can be found HERE at my favorite scrap store ScrapsFromTheHeart!  What a fun kit Becca!!!!!
The gorgeous mask is by
Moon Beams & Spiderwebs thank you so much Staci!
Font: Any script one, I used Beau Rivage One by Rob
  ~~~~~~ ♥ ~~~~~~
We will be using the following layered as such for the end result they should be in this order starting from the bottom:
MaskPaper P03
Ele 37 fleur
Ele 06 Shoe Mirror resize 35%
Word Art by me.
Ele 32 Emo
Tube FI0025 resize 90%
Ele 33 Frame
Ele 10 Lollipop resize 80% rotate 20% right
Ele 38 bow resize 35% rotate 20% right
**After you use each element close it so you have a clean workspace.
 Okay, let’s get started!
Please note, you can reposition the elements once completed before merging!

  1. Open a canvas 700 x650 select all and paste paper P03 into selection, select none.
  2. Add your mask, merge group. 
  3. Add a new white layer and move to the bottom so you can see your work better, you will delete it later!  Return to your mask layer and resize it 90%
  4. Paste Ele 32 (Emo) as a new layer and move to the far upper right.
  5. Paste your tube (FI0025) as a new layer, resize 90%.
  6. Add the word art towards the bottom leaving apple room for your drop shadow.
  7. Copy and paste frame Ele33 (frame) as a new layer on top of the tube layer.
  8. Return to your tube and move it so that it fits within the frame, use your point to point to select and remove any overlap the tube that extends outside of the frame.
  9. Past Ele 10 Lollipop as a new layer resize 80% rotate 20% right. Position in the lower right.
  10. Copy Ele 38 bow and resize 35% rotate 20% right and position on top of the lollipop.
  11. Return to your mask layer and paste Ele 37 fleur as a new layer, add a black drop shadow no blur as a new layer at an obvious distance.  (After you resize you can add the fleur again as I did without resizing it)
  12. Make sure you are happy with where everything is positioned, close your white layer, then merge visible, copy and paste as a new image, resize 80%. (I added another fleur unrevised under the image here!)
  13. Apply your copyright, URL, and your UpYourArt license number.
Add your name using the font of your choice.
Save as a PNG, you are done, YAY♥
Thank you for visiting and doing this tutorial, I hope you found it enjoyable. I would love to see your results and I welcome any suggestions at CustomerService@UpYourArt.com
Raps


Tuesday, May 14, 2013

Sea Breeze


This tutorial was created by Rapsody on May 15th, 2013.
Any similarity to any other tutorial is purely a coincidence.
You may share this tut but please share the only the link, thank you
♥
I am using PSP 15 but any version should work!

We are using the lovely art of  
Gary George  Tube GG0023 you must have a license to use this tube. All of Gary’s tubes must be purchased at UpYourArt
This wonderful kit “Sandy Toes and Salty Kisses” by Horse Play Pastures can be found HERE Thank you so much Bevieeeeeeee!♥

We will be using:
Your favorite Gary George tube, I used GG0023.
Font: Arizona @ 100.
Circle Mask: Thank you Monti!  Can be found
HERE
hpd_ST&SK-Paper 10
hpd_ST&SK EL34 Rope Frame
hpd_ST&SK EL1 Net rotate 90% right
hpd_ ST&SK  EL11 Sand resize 77%
hpd_ST&SK EL9 Splash @ 73%
hpd_ ST&SK EL17 Sparkles 28%
hpd_ST&SK EL5 Tall grass @ 56%
hpd_ ST&SK EL15 Bottle 38%
hpd_ ST&SK EL4 Crab 32%
hpd_ST&SK EL20 double shell 68%
hpd_ ST&SK EL64 Shell@ 40%
hpd_ ST&SK EL10 Starfish @ 30%
hpd_ST&SK EL51 butterfly 35%
Font Arizonia 100pts
**After you use each element close it so you have a clean workspace.

Okay, let’s get started!

*Open Paper 10 duplicate and close the original.  Apply Monti’s circle mask (source from image), Merge group and resize 63% making certain to put your resolution at 72.
*Open a new image 600 x 600 with a white background (we will delete it when finished), copy your merged paper/mask paste as a new layer, add a drop shadow with these settings 3 3 70 30 with #85bbc3, resize layer to  92%.  You may close the original in order to keep your pallet uncluttered.
*Paste hpd_ST&SK EL34 Rope frame as a new layer, resize 85% add the same drop shadow you just used, move towards the upper top as far as you are able making sure your mask is aligned.
*Add Tube GG0023 as a new layer, resize 68% use my tag for reference for positioning, add your same drop shadow.
*Add hpd_ST&SK EL1 Net as a new layer, resize 78%, rotate 90% right, position on the top of the frame, add drop shadow with #40ffff.
*Add hpd_ST&SK EL9 Spash add same drop shadow.

*Paste hpd_ ST&SK EL17 Sparkles as a new layer resize 28%. Move to the inner left add the same drop shadow but use white, duplicate and move to the right and a little higher, duplicate again and move to the right using my tag as reference. 

*Resize hpd_ST&SK EL11 Sand 105% and paste as a new layer, use drop shadow with these settings 3  3 100 30 color #794f33.
*Hide the sand layer and return to your tube layer.  Carefully hand select her arm, go back to the sand layer and make the layer active, delete, making sure her arm is clear of all sand, select none, use your eraser tool if necessary.
* Copy
hpd_ST&SK EL5 Tall grass resize 56% and paste as a new layer, add same drop shadow with #9bd101 as the color move to the left side of the frame, duplicate resize 85% and move to the right of the original.
*Add hpd_ST&SK EL9 Spash as a new layer, resize 73% move up, let it “splash” on your tube, add same drop shadow with #40ffff.
*hpd_ST&SK EL15 Bottle resize 38%  same drop shadow with color #40ffff place just in front of the tall grass.
*Add hpd_ST&SK EL4 crab resize 32%, add same drop shadow but with color #715535 place to the right of the bottle.
*Paste hpd_ST&SK EL20 double shell as a new layer, resize 68% place to the right of the crab, add same drop shadow.
*Paste hpd_ST&SK EL64 Seashell resize 40%, add same drop shadow settings, place to the right of the double shell so that the girl looks to be reaching for it.
*Add hpd_ST&SK EL10 starfish as a new layer, resize 30%, and place to the right of the last shell.
*Copy and paste hpd_ST&SK EL51 butterfly as a new layer, resize 35% and place on the mid-upper left, add drop shadow with #40ffff.
*Make sure everything is where you like it, check for anything stray and remove, then delete the bottom white layer, merge visible.
*Apply your copyright, url, and license number.
*Add names, using
Arizona, I used 2 colors, purple and green from the butterfly then added two drop shadows
.
*Save as a PNG, you are done, YAY
♥
Thank you for visiting and doing this tutorial, I hope you found it enjoyable. I would love to see your results and I welcome any suggestions at CustomerService@UpYourArt.com
Raps
♥ ♥ ♥


Tuesday, July 10, 2012

Divine


This tutorial was created by Rapsody on July 10th, 2012.
Any similarity to any other tutorial is purely a coincidence.
I have not used plugins or drops shadows but recommend you use them where you see fit.
You may share this tut but please share the only the link, thank you♥
I am using PSP 14 but any version should work!

We are using the lovely art of Gretchen Raishe-Baskin  GR0009, you must have a license to use this tube. Gretchen’s tubes must be purchased at UpYourArt
This wonderful kit “So Devine” by Leigh Penrod can be found HERE Thank you so much Leigh!♥
Font AlexBrush which You can find HERE.

We will be using:
Tube GR0009
E31 (White Frame)
P7 (paper)
E16 (beads)
E40 (flower stem)
E10 (baby's breath)
E11 (angel sleeping)
E34 (blue ribbon)
E39 (flowers with ribbon)
Blue butterfly from tube
**After you use each element close it so you have a clean workspace.

Okay, let’s get started!

*Open a pallet 700 X 700, flood fill white.
* Copy E31 (White Frame) as a new layer, resize 42%
Add a drop shadow AS A NEW LAYER with these settings:
0 0 100 15
I used #ad83f5.
Go to your shadow layer, add FUR texture effect with all settings maxed.
*Go to the original frame layer, with your selection tool touch activate the inside of the frame.
*Go to the white (bottom) layer, & create a new layer. Paste paper P7 into selection.  Select none.
*Stay on the paper layer and add the effect blinds with these settings:
20  50 and white
Do it horizontally, then vertically.
*Copy E16 (Beads) and paste as a new layer.  Resize 20%, move to the right, see my tag for reference.
*Paste E40 (flower stem) as a new layer, resize 12% and move to the right of the frame being careful to not have any overlap on the frame.  Duplicate, and move down a bit and remove any over hang on the frame.
*Paste E10 (baby's breath) as a new layer, resize 8%, mirror and position on the lower left corner.
*Paste E11 as a new layer, resize 19% and position on the lower left as well.
Copy your tube (GR0009) and paste as a new layer, remove butterflies.  Add a drop shadow with the same color and fur settings.
*Return to the top layer, paste E34 (blue ribbon) resize 20% then rotate left 90, position on the right near her hand, see my tag for reference.
Paste E39 (flowers with ribbon) as new layer resize 12% then move to the left side.
*Go to your tube and find the butterfly layers, select the blue one then paste it as a new layer, position on the upper left.
*Make sure everything is where you desire it.
*Merge, select all, float, crop to selection.
* Resize all 70%.
*Add your Copyright and URL and license number.
*Add name, I used Alexbrush  at 75 white with the same drop shadow used throughout this tut.
*Save as a PNG, you are done, YAY♥
Thank you for visiting and doing this tutorial, I hope you found it enjoyable. I would love to see your results and I welcome any suggestions at CustomerService@UpYourArt.com
Raps
♥ ♥ ♥

Thursday, June 21, 2012

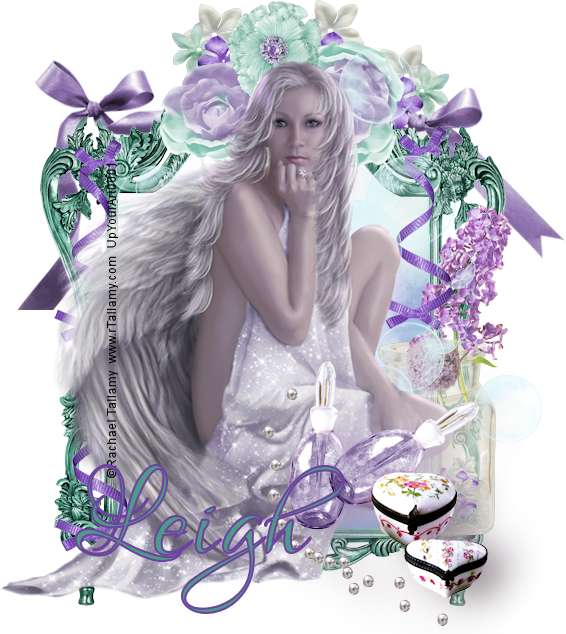
Be Mine


This tutorial was created by Rapsody on June 21st, 2012.
Any similarity to any other tutorial is purely a coincidence.
I have not used plugins or drops shadows but recommend you use them where you see fit.
You may share this tut but please share the only the link, thank you♥
I am using PSP 14 but any version should work!

We are using the lovely art of Rachael Tallamy  RT0041, you must have a license to use this tube. Rachael’s tubes must be purchased at UpYourArt
This wonderful kit “Be Mine” by Leigh Penrod can be found HERE Thank you so much Leigh!♥
Font Lover’s Quarrel which is a pay font by Rob but any font will work.

We will be using:
Tube RT0041
E20 (green frame) @ 23%
E22 (purple ribbon) @ 21%
P6
EA0032 @ 10%
E24 (long purple flower) @ 10%
E30 (round lavender flower) @ 5% mirror
E2 (purple ribbon vertical) @ 10%
E26 ( large flower) @ 6%
E18 (large flower) @ 20%
E16 (bubbles) @20%
E17 (parfum) @ 15%
E33 (flower cluster) 20%

**After you use each element close it so you have a clean workspace.

Okay, let’s get started!

*Open a canvas 700 x700 flood fill white. I like to have this layer so I can see my creation better as I work on it.  We will delete this later as well as resize.
*Copy and paste E20 as a new layer, resize 23%.
*Paste E22 as a new layer, resize to 21% move to the top of the frame, move layer down under the frame.
*Add a new layer, go to the frame layer, select the inner part of the frame, go back to layer you just created and paste P6 into selection.  Select none move blow the ribbon layer.
*Return to your top layer (the frame) and paste EA0032 as a new layer, resize 10% and move to the lower right of the frame.
*Paste E24as a new layer, resize 10% place so it is coming out of the vase below.
*Paste E30 as a new layer, resize 5%, mirror and place near the last flower.
*Paste E2 as a new layer resize 10% position on the side of the frame, duplicate, and move to the left side of the frame, duplicate again and move below the ribbon you just did.
*Paste E26 as a new layer, resize 6%, and move to the top left center of the frame.  Duplicate, flip and move to the right of the center.
*Paste E18 as a new layer, resize and position in the center of the upper frame (between the other 2 flowers you just added.)
*Paste E16 as a new layer, resize 20% and move slightly off center to the right.
*Paste your tube as a new layer, resize 90%, mirror.
*Paste E17 as a new layer, resize 15% move to lower right, duplicate, go to the lower original and use these texture settings:
Blur 100  Density 100    Length 75    Transparency 255
*Position all where you like, close the white layer, merge visible.
*I then added E33 as new layer, resized 20% and place in several places as I saw fit under the main image, see my tag for example.
*Merge, select all, float, crop to selection.
*Add your Copyright and URL.
*Add name, I used Lover’s Quarrel at 150 with 2 colors from the tag with a slight drop shadow.

*Save as a PNG, you are done, YAY♥
Thank you for visiting and doing this tutorial, I hope you found it enjoyable. I would love to see your results and I welcome any suggestions at CustomerService@UpYourArt.com
Raps
♥ ♥ ♥

Monday, April 30, 2012

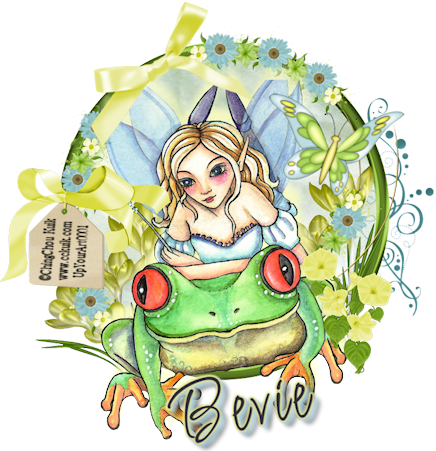
Whimsy


This tutorial was created by Rapsody on April 30th, 2012.
Any similarity to any other tutorial is purely a coincidence.
I have not used plugins or drops shadows but recommend you use them where you see fit.
You may share this tut but please share the only the link, thank you♥
I am using PSP 12 but any version should work!

We are using the lovely art of  Ching Chou Kuik  CK0001, you must have a license to use this tube. Ching Chou’s tubes must be purchased at UpYourArt
This wonderful kit “Whimsical” by Horse Play Pastures can be found HERE Thank you so much Bevieeeeeeee!♥
Font Licorice which is a pay font by Rob but any font will work.

We will be using:
Tube CK0001
hpd_Whimsical_39
 hpd_Whimsical_ Paper 17
hpd_Whimsical_37
hpd_Whimsical_5
hpd_Whimsical_29
hpd_Whimsical_57
hpd_Whimsical_20
hpd_Whimsical_33
**After you use each element close it so you have a clean workspace.

Okay, let’s get started!

*Open a canvas 800 x800 flood fill white. I like to have this layer so I can see my creation better as I work on it.  We will delete this later as well as resize.
*Copy and paste hpd_Whimsical_39 as a new layer.
*With your selection tool, touch the center of the frame, modify, expand 3, return to your white layer (bottom) and create new layer then paste hpd_Whimsical_Paper17 into selection, select none.
*Hide your white layer, then merge visible.
*Unhide the white layer, copy and paste hpd_Whimsical _37 as a new layer and position so it overlaps evenly on your top layer.
*Stay on the top layer, copy and paste hpd_Whimsical_5 as a new layer. Resize to 60%  and rotate left 30, position on the upper left between the blue flowers, see my tag for reference. Or you may add this at the end on the top layer as I did on my tag.
*Paste your tube as a new layer, add a soft drop shadow of choice on new layer so you can adjust to your preference. This is what I used:
Photobucket
*Copy and paste hpd_Whimsical 29 as a new layer, resize 60% and move to the right of your tube.
*Copy and paste hpd_Whimsical 70 as a new layer resize 50% and move to the left, see my tag for reference.
*Paste hpd_Whimsical 57 as a new layer, resize 30% position to the right of the frog, duplicate and mirror and position near the original.
*Go to your bottom layer, and add hpd_Whimsical 20 as a new layer move to the right of the tag.
*Now go to the next layer, (merged frame and paper) and add hpd_Whimsical 33 as a new layer, resize 50%. Move to the left of the tube, see my tag for reference.  Duplicate layer, mirror and position on the right side.
*Feel free to add any other embellishments from this lovely kit.
*Add your copyrights, url, and license number.
*Merge visable, select all, float, crop to selection, resize 60%.
*Add your name and you are done!

*Save as a PNG, you are done, YAY♥
Thank you for visiting and doing this tutorial, I hope you found it enjoyable. I would love to see your results and I welcome any suggestions at CustomerService@UpYourArt.com
Raps
♥ ♥ ♥

Saturday, March 17, 2012

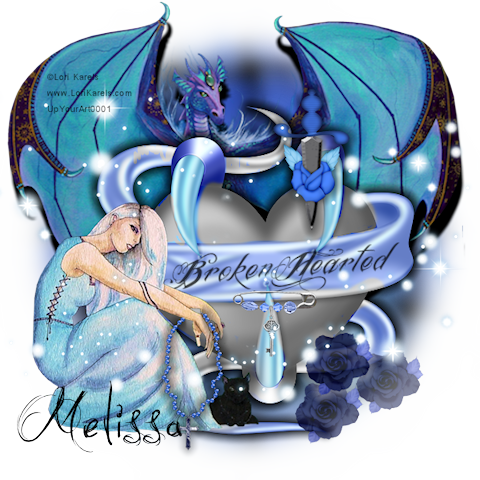
Broken Hearted


This tutorial was created by Rapsody on March 18th, 2012.
Any similarity to any other tutorial is purely a coincidence.
You may share this tut but please share the only the link, thank you♥
I am using PSP 14 but any version should work!

We are using the lovely art of Lori Karels LK0022 Moon Witch, and LK0027 Dragon Wizard, you must have a license to use these tubes.  Lori’s tubes must be purchased at UpYourArt
This wonderful kit “Midnight Blue” by Rabid Bunny can be found HERE Thank you so much Melissa!♥
Font: Jellyka Castle's Queen, You can find it HERE.

We will be using:
Tubes LK0022 Moon Witch @49%, and LK0027 Dragon Wizard @ 95% (cut off the tail)
Element_33 (Disco Ball)
Element_15 (Heart with Fangs)
My attached word art, Broken Hearted
Element_25 (Necklace)
Element_6 (Safety Pin with Key)
Element_45 (Dagger)
Element_10 (Dark Blue Rose)
Element_26 (Sparkles)
**After you use each element close it so you have a clean workspace.

Okay, let’s get started!

*Open a canvas 600 x600 flood fill white. I like to have this layer so I can see my creation better as I work on it.  We will delete this later as well as well as resize.
*Paste Element_33 as a new layer, go to effects, texture, Mosaic Glass with these settings:
Photobucket
*Stay on this layer and go to effects Textures, Weave, with these settings:
Photobucket
*Stay on this layer, go to effects, Textures, Fur with these settings:
Photobucket.
Copy LK0027 (Dragon Wizard) paste as a new layer resize 80% and move towards the top, select & remove tail.  See my tag for reference, remember we can make adjustments before we merge at completion. Add a drop shadow as a new layer with these settings:
Photobucket
Blur with these settings:
Average, Aperture 5, move it slightly down.  Return to the upper layer.
*Paste Element_15 (Heart With Fangs) as a new layer, use my tag for reference. Follow the same directions as above for drop shadow, then return to your top layer.
*I have included this overlay if you are not comfortable using the change to target tool.  I would encourage you to try it before using mine.  How I did it was I put the target color to #00000 and carefully colored the heart portion of the element, it’s really easy but does take about 10 mins to do so.  If you do it on your own simply select my words and put on the desired location.
Photobucket
Thank you so much Melissa for allowing me to provide this♥
*Paste
LK0022 Moon Witch as a new layer, resize 49% and move to the lower left.
Paste Element_25 (Necklace) as a new layer, resize  35% position so she appears to be holding it, select and delete a bit near the upper hand, select none  add the same drop shadow as above and blur do not move.
*Paste Element_6 (Safety Pin with Key) resize 25% and position over the drop, use my tag for reference.
*Add Element_45 (Dagger) as a new layer, resize 40% and move to the upper left of the ribbon, add drop shadow same as above.
*Paste Element_10 (Dark Blue Rose) as a new layer, resize 20% move to the bottom right, lower opacity to 78. Duplicate 2 times and position like my tag.
*Paste Element_26 (Sparkles) as a new layer, move down just a tad, if you desire, use your selection tool to remove the sparkles from her face.


*Make sure everything is where you like it, check for anything stray and remove them, then delete the bottom white layer, merge visible, resize 80%.
*Apply your copyright, URL, and your UpYourArt license number.
*Add names, using
Jellyka Castles Queen in black.
*Save as a PNG, you are done, YAY
♥
Thank you for visiting and doing this tutorial, I hope you found it enjoyable. I would love to see your results and I welcome any questions or suggestions please Email Me
Raps
♥ ♥ ♥