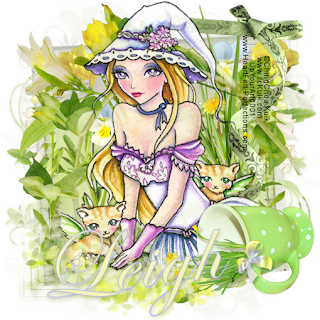
This tutorial was created by Rapsody on September 27, 2011.
Any similarity to any other tutorial is purely a coincidence.
You may share this tut but please share the only the link, thank you♥
I am using PSP 12 but any version should work!
We are using the amazing art of Ching Chou Kuik You must have a license to use this tube. Ching Chou's tubes can purchased at UpYourArt
The gorgeous amazing scrap kit “In the Garden” is found at HeartFelt-Perfections, Thank you Leigh!
We will be using:
paper 2
frame 2
floral brush
floral cup
ribbon
Grass
floral cup
floral brush
floral 10
floral 6
floral
floral 2
ribbon
**After you use each element close it so you have a clean workspace.
Mask can be found at Essex Girl (Cornered Octagon)
Font: Edwardian Script ITC size 125
Okay, let’s get started!
*Open a canvas 600 x600 select all, paste into selection paper 2, select none.
*Apply your mask, merge group. Add drop shadow on a new layer with #a4b571 opacity 8.
*duplicate mask layer and go to bottom mask layer.
*Find frame element paste as a new layer so it is between the 2 mask layers, resize 25%.
*Copy tube CK0055 and paste as a new layers, resize 85%, and move all the way up lower opacity to 85%.
*Grab frame 2, paste as a new layer, resize 25%, rotate 90% lower opacity 85%, move below tube.
*Grab the floral brush, paste as a new layer, resize 17%, move to bottom left of tube.
*Get your floral cup, resize 75% move to right of tube to cover edges of tube.
*Return to the top mask layer.
***To add the flowers, I like to have my Picker tool activated so I can find them easily and tweak them if needed.
*Copy floral 10, paste as a new layer, resize 15% move to the left, duplicate, mirror then move to the right.
*Copy your floral 6, paste as a new layer, resize 15%, move to desired location on left, duplicate, then mirror and move new one appropriately on right side. Select and delete any that hangs too low on the bottom.
*Copy, floral 2, paste as new layer, resize 15%, duplicate, mirror, arrange
*Copy grass and paste as a new layer, resize 16%, move toward right, duplicate, mirror then move to upper left.
*Copy bow, paste on your tag as a new layer, resize 20%, move to upper right.
*Merge visible, resize all 85%
*Apply your copyright, url, and license number.
*Add name, using Edwardian font, using 2 colors from your tag.
*Save as a PNG, you are done, YAY♥
Thank you for visiting and doing this tutorial, I hope you found it enjoyable. I would love to see your results and I welcome any suggestions at CustomerService@UpYourArt.com
♥ ♥ ♥


No comments:
Post a Comment