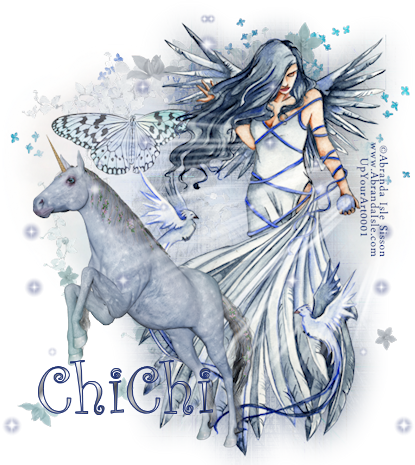
Fairy Tale
This tutorial was created by Rapsody on February 29th, 2012.
Any similarity to any other tutorial is purely a coincidence.
You may share this tut but please share the only the link, thank you♥
I am using PSP 12 but any version should work!
We are using the lovely art of Abranda Icle AI0014, you must have a license to use this tube. Abranda’s tubes must be purchased at UpYourArt
This FTU enchanting scrap kit “Fairy Tale” by ChiChi Designz can be found HERE Thank you so much Cindy!♥
Font Curlz MT @ 90 pt. Outline #223474, any silver gradient.
We will be using:
Tube AI0014 Blue Moon
Heart_CD_FairyTalesSampler
Flowers_CD_FairyTalesSampler
Branches_CD_FairyTalesSampler
Butterfly_CD_FairyTalesSampler
Sunray_CD_FairyTalesSampler
Unicorn_CD_FairyTalesSampler
Sparkle_CD_FairyTalesSampler
**After you use each element close it so you have a clean workspace.
Okay, let’s get started!
*Open a canvas 600 x600 flood fill black. I like to have this layer so I can see my creation better as I work on it. We will delete this later as well as resize.
*Paste Heart _CD_FairyTalesSampler as a new layer.
*Paste Branches_CD_FairyTalesSampler as a new layer, move up on the heart (use my tag as a reference, then move down one layer.
*Return to the heart layer and paste Flowers_CD_FairyTalesSampler as a new layer, resize 90%.
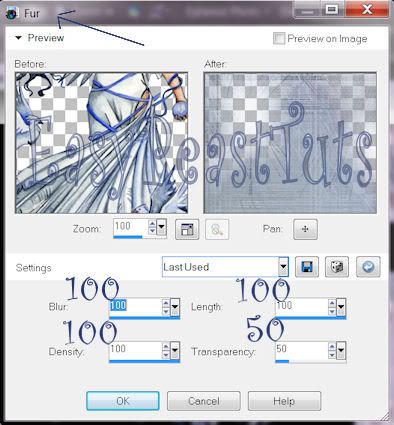
*Paste your tube as a new layer, resize 90% move to the right, duplicate, on the bottom tube layer, do Texure effect, Fur with these settings:
100, 100, 100, 50
*Paste Unicorn_CD_FairyTalesSampler as a new layer, resize 70% move to the bottom left.
*Paste Butterfly_CD_FairyTalesSampler as a new layer, resize 30% move to the left of tube’s hair, lower opacity to 65%.
*Go to your top layer, add Sunray_CD_FairyTalesSampler as a new layer, resize 90%, set your feather tool to 10 and remove the bottom quarter of the ray, see tag for reference.
*Add Sparkle_CD_FairyTalesSampler as a new layer, resize 90% move to the right, duplicate. Mirror and position like my tag.
*Make sure everything is where you like it, check for anything stray and remove them, then delete the bottom black layer, merge visible, select all, float, crop to selection, resize 80%.
*Apply your copyright, url, and license number.
*Add names, using Curlz MT, using 2 colors from your tag, I used #223474 and a silver gradient with a white gradient glow.
*Save as a PNG, you are done, YAY♥
Thank you for visiting and doing this tutorial, I hope you found it enjoyable. I would love to see your results and I welcome any suggestions at CustomerService@UpYourArt.com
Raps
♥ ♥ ♥


Wow, that's stunning hun!!
ReplyDeleteThank you so much for playing with my kit ♥
Hugz xoxo